Etsy lets you add up to 20 photos and 2 videos. Your first photo is the thumbnail shoppers see everywhere, so make it your strongest mockup.
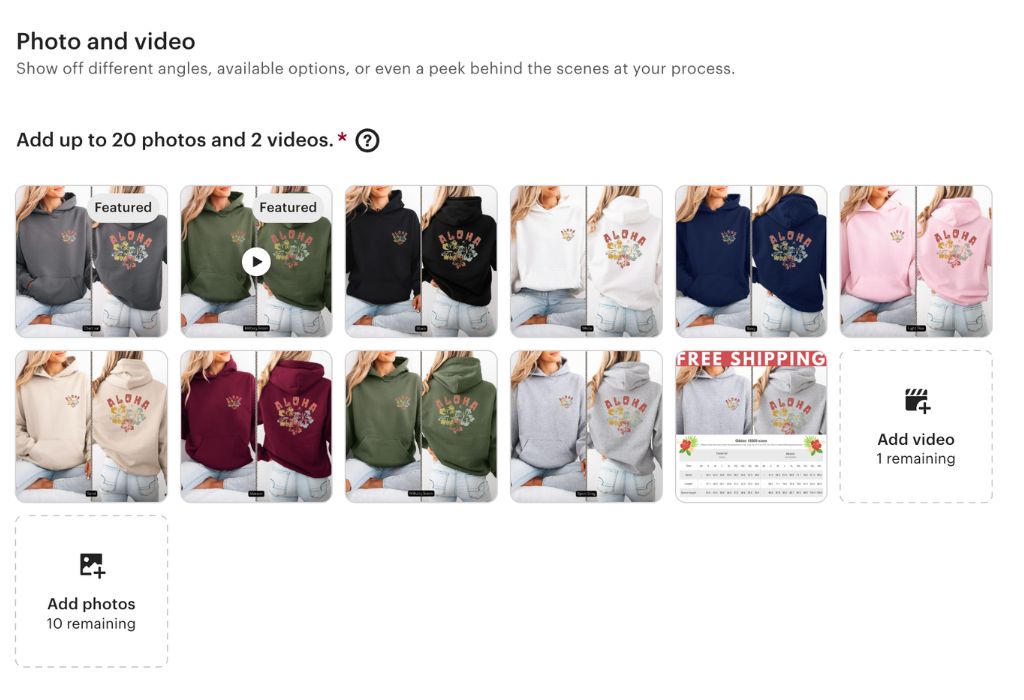
- Photo 1 (thumbnail): Your best mockup — set it as Featured / Primary
- Photos 2–20: Lifestyle shots, detail close-ups, size chart, and color variations
- Videos: Up to 2 short clips (e.g. a design detail or on-body view)
Click any image to add alt text and adjust how the thumbnail crops. Alt text helps visually impaired shoppers and improves AI / search visibility.
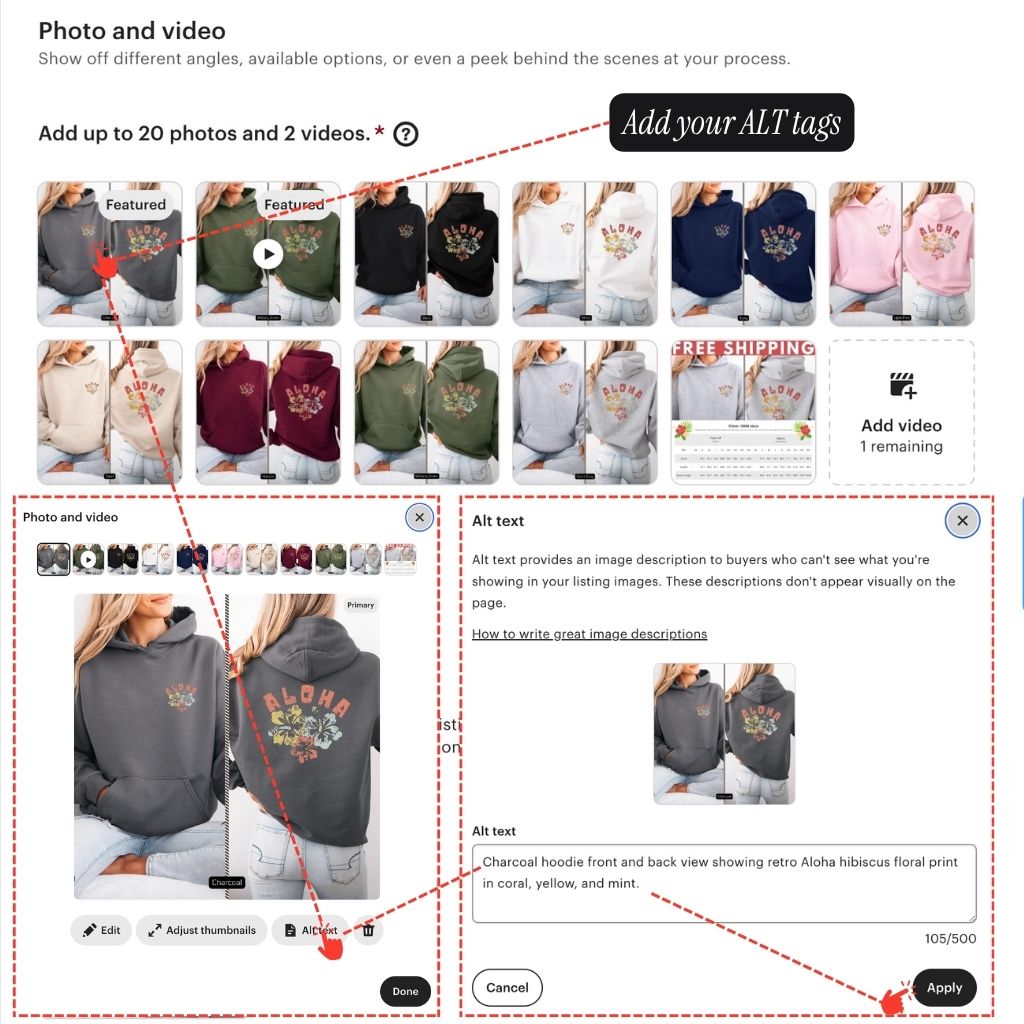
- Alt text: Describe the image — design, product, color, audience. Etsy allows up to 500 characters
- S27 length: Keep each alt tag 80–140 characters (S27 recommended) as a complete sentence
- Thumbnail crop: Use "Adjust thumbnails" to preview how your primary photo crops across Etsy
Pick the most specific category you can — it controls which attribute fields Etsy shows you later.
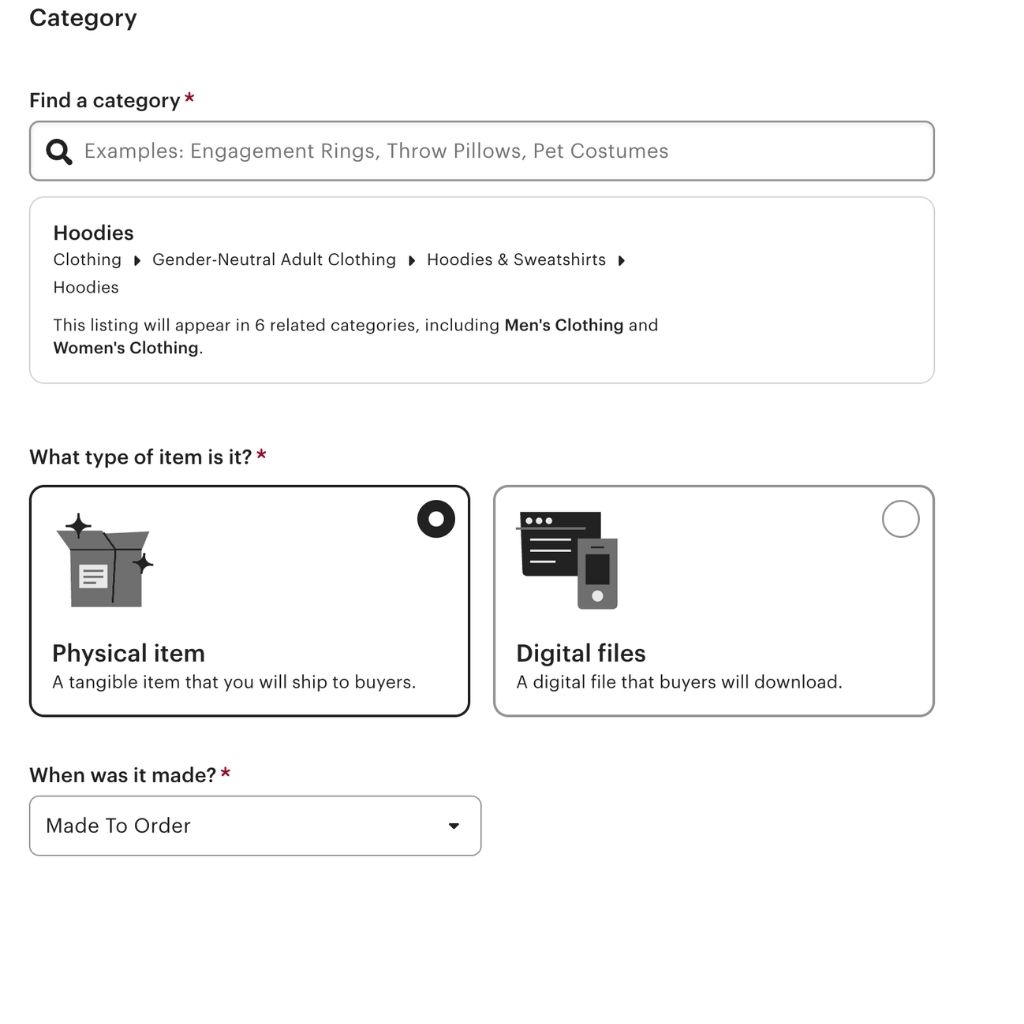
- Find a category: Type your product type (e.g. "Hoodies") and choose the most specific match
- Item type: Choose "Physical item" for POD products
- When was it made: Choose "Made To Order" for print-on-demand
The title field accepts up to 140 characters, but S27 recommends a focused 65–80 character title with your top keywords front-loaded for mobile.
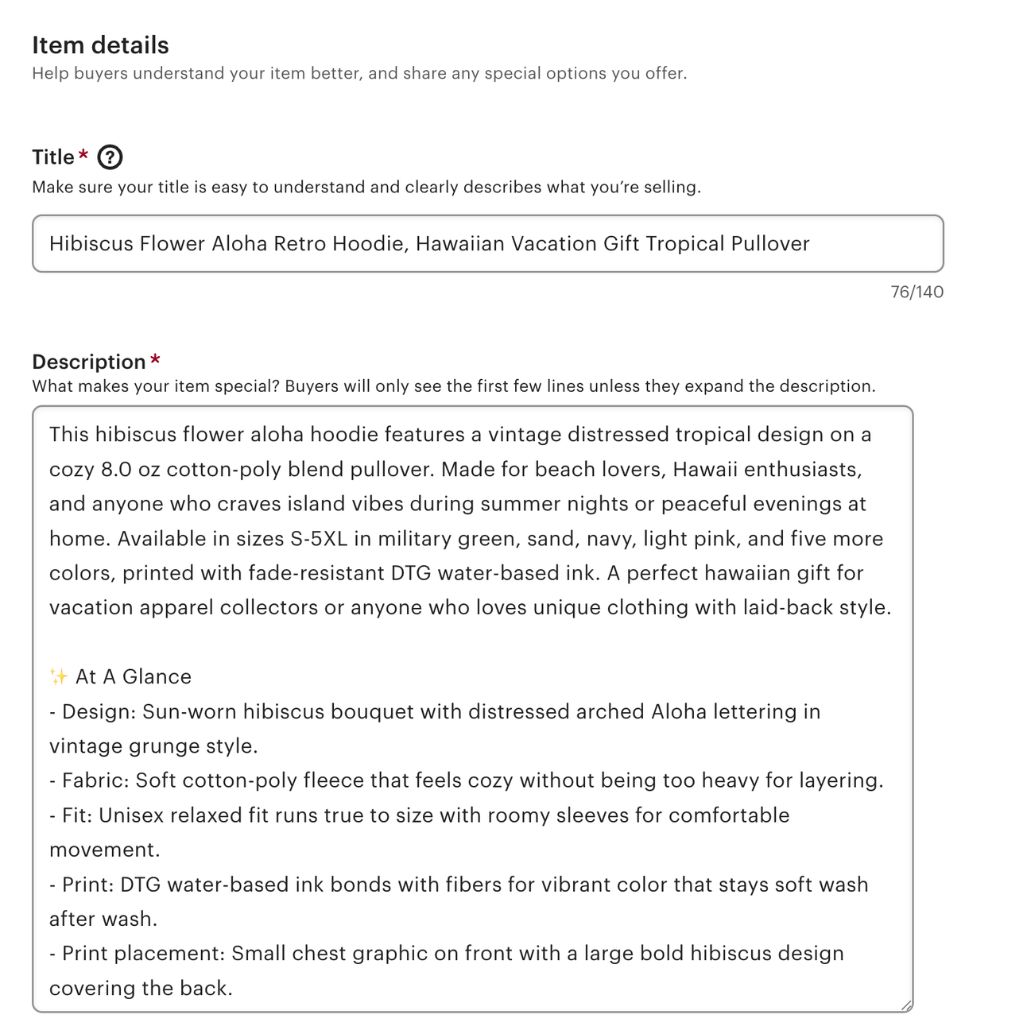
- Title field: Paste your S27-optimized title (65–80 chars recommended; 140 max)
- Front-load: Put the motif + product type in the first ~40 characters
- Keep it human: Readable for shoppers AND AI — no keyword stuffing
The description tells your product's story and is critical for both Etsy search and AI agents like ChatGPT and Gemini. Paste your full S27 description — it follows the richer June 2026 structure.
- Structure: Front-Loaded Summary → At A Glance → Story Behind the Design → Product Specs → Quick Answers → Perfect For → Ordering Info → Store branding → GPSR block
- Technical specs: Put fiber content, fabric weight, print method, and ink type in Product Specs here — not in the old free-text materials field (now removed)
- GPSR block: The EU compliance text sits at the end of the description (also added as structured data in Step 10)
Add the options that affect inventory — usually Color and Size. Etsy builds a row for every combination.
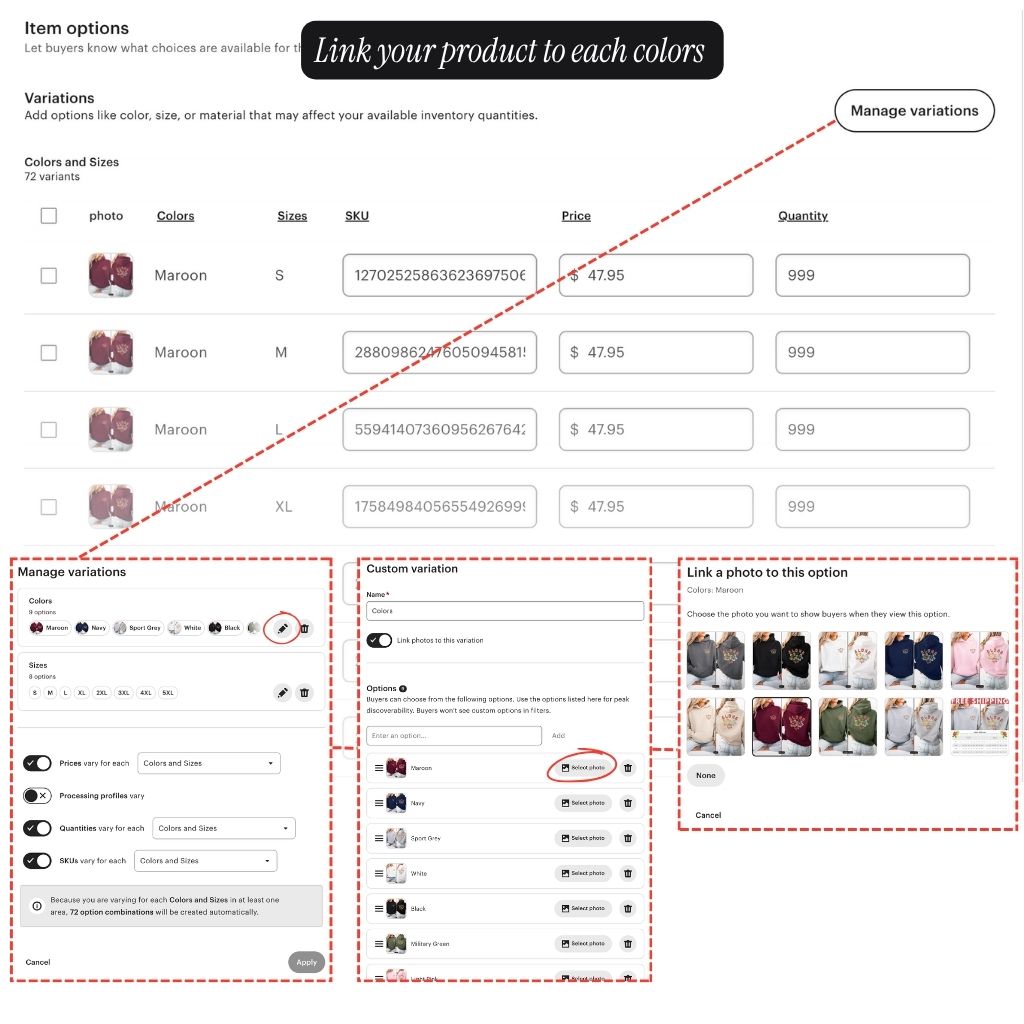
- Variations: Add Color and Size; Etsy generates a row per combination (e.g. 9 colors × 8 sizes = 72)
- Link a photo to each color: So the matching mockup shows when a shopper selects that color
- Custom options: Optional — up to 5 buyer input fields (these don't affect inventory)
Etsy gives you 13 tag slots, up to 20 characters each. Use all 13 — every empty tag is a missed chance to be found.
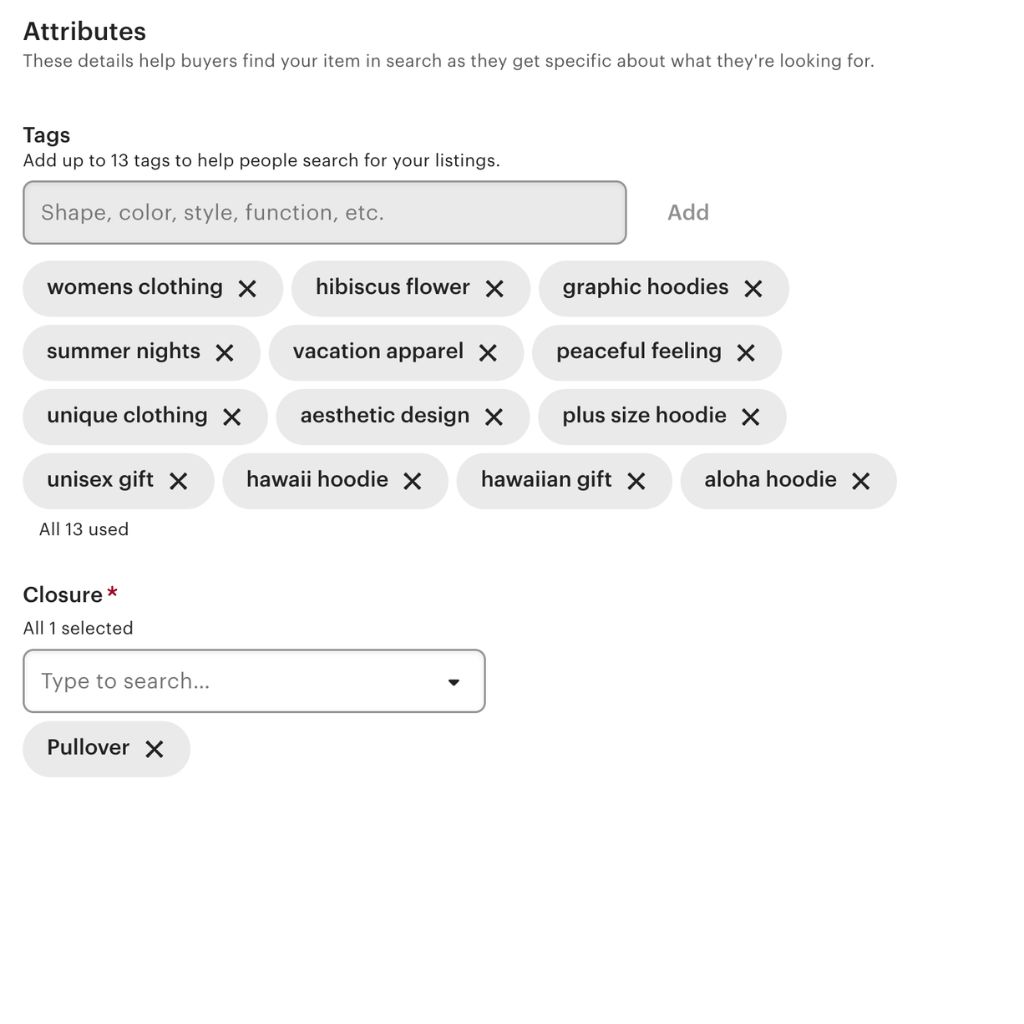
- Tags 1–13: One long-tail keyword phrase per tag (max 20 characters each)
- Strategy: Mix broad terms ("hawaii hoodie") with specific long-tail ("vacation apparel")
- Don't repeat: Tags that just echo words already in your title are wasted
Fill in every attribute that applies — these are search filters shoppers and AI agents use. The fields shown depend on the category you chose in Step 3.
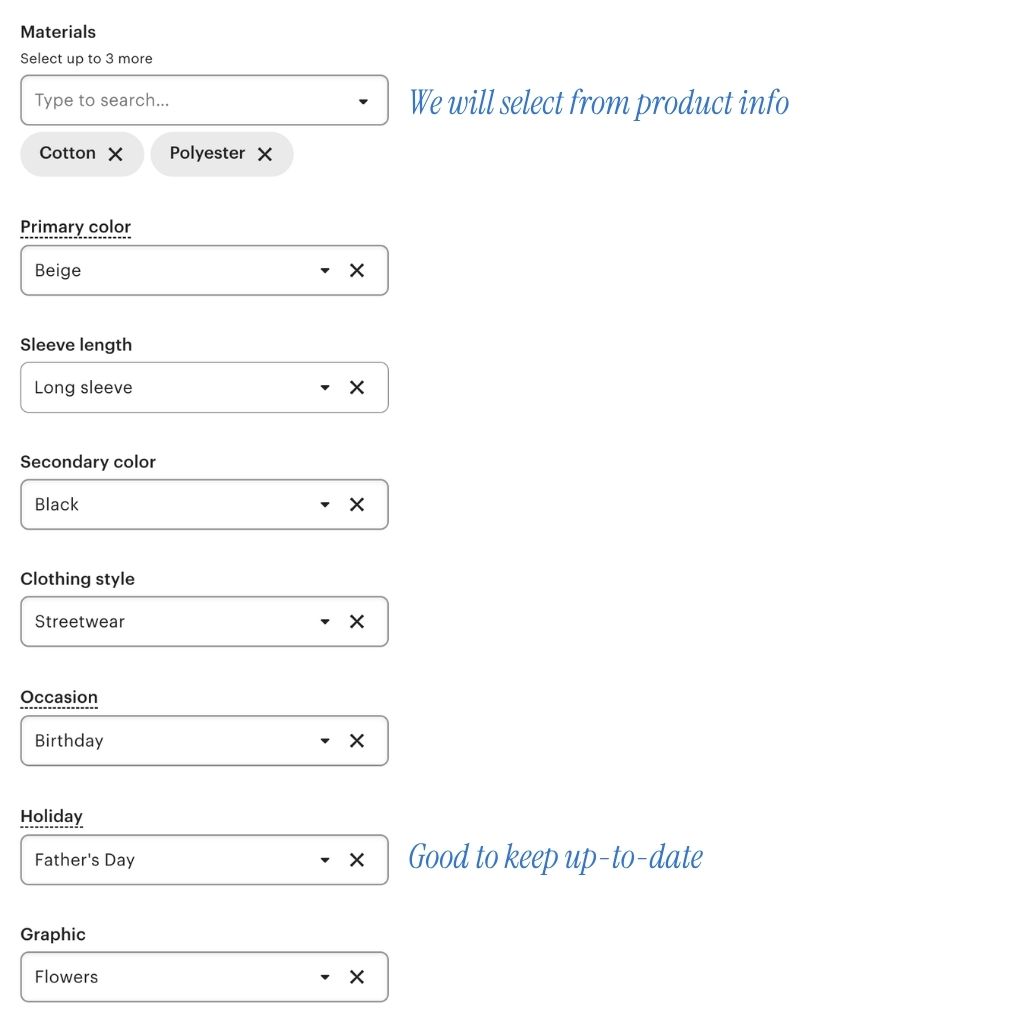
- Closure: Required for many apparel categories (e.g. Pullover)
- Materials: Now a dropdown / chip field here — pick from the list (observed up to 5 in the June 2026 form)
- Primary / Secondary color: Choose the closest match
- Sleeve length, Clothing style, Graphic: Fill in all that apply
- Occasion / Holiday: Keep these current and seasonal (e.g. Birthday, Father's Day)
Set price, quantity, and SKU. When you use variations, these are edited per-variant inside the variations table.
- Price: Set per variant (larger sizes are often priced higher); Etsy shows estimated earnings
- Quantity: For POD set it high (e.g. 999) — made to order
- SKU: Per-variant SKU from your POD provider — helps you track fulfillment
Set your processing time, shipping profile, and return policy. This is also where the structured GPSR safety info goes.
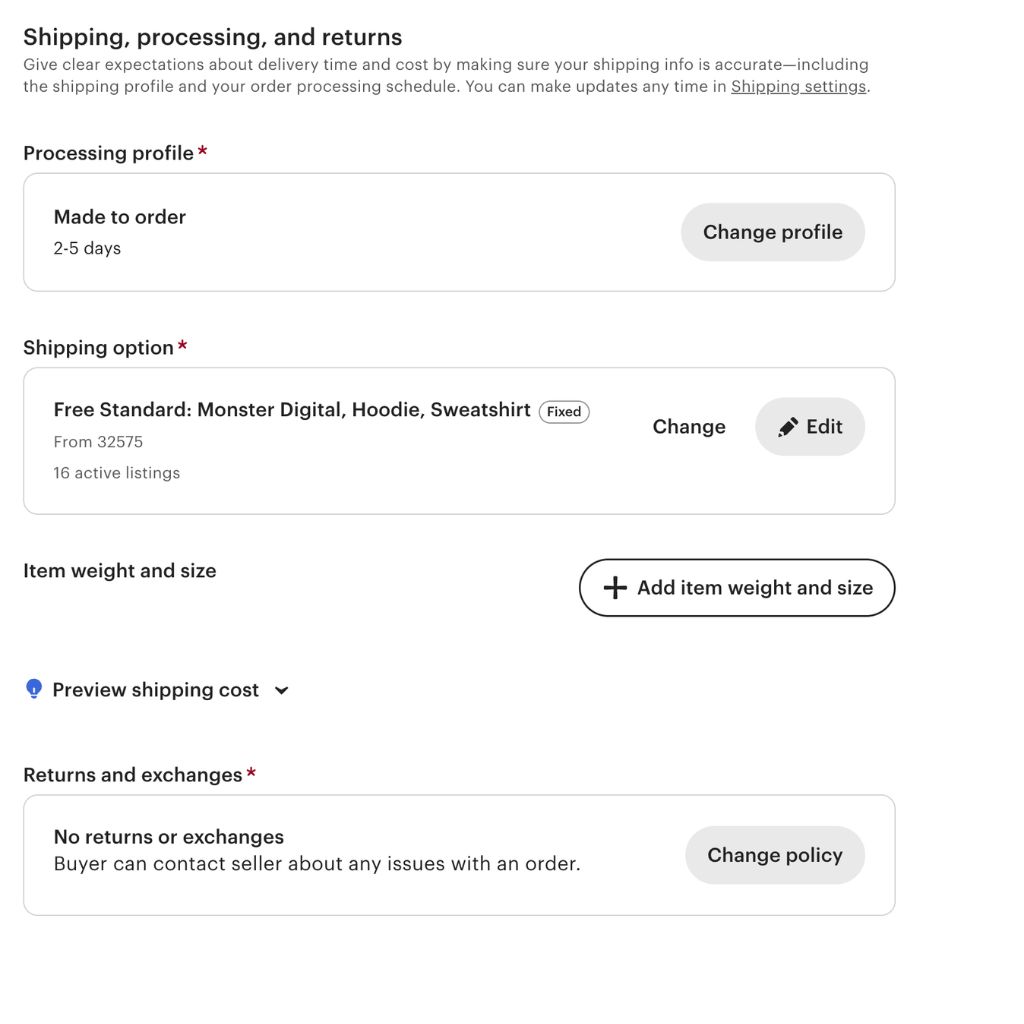
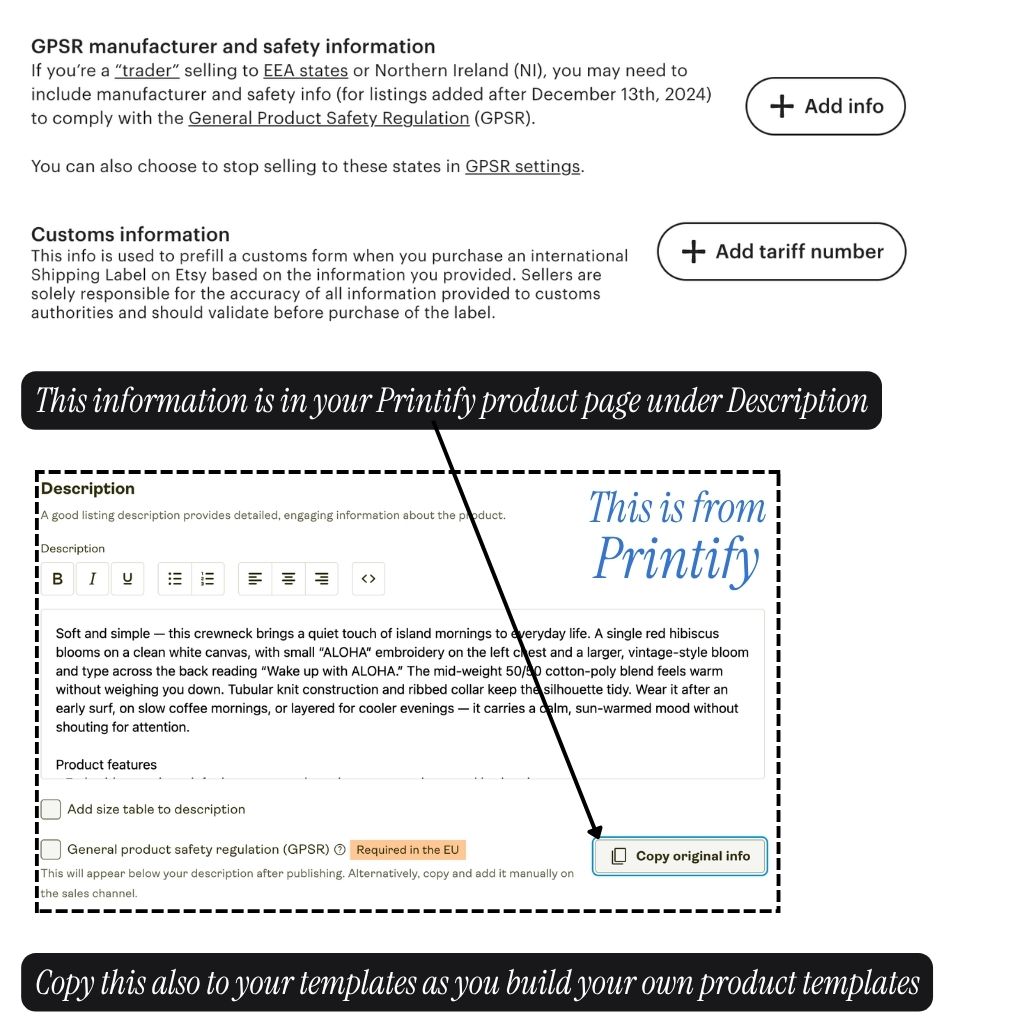
- Processing profile: Your make + handling time (Made to order, ~2–5 business days for POD)
- Shipping option: Select your shipping profile (e.g. Free Standard)
- Returns & exchanges: Set your policy (many POD sellers use "no returns" for made-to-order)
- GPSR (Add info): Add the manufacturer / safety data — copy it from your Printify product page (Description → Copy original info)
Tell Etsy who made the item and add your print provider as a production partner. Etsy requires this for POD transparency.
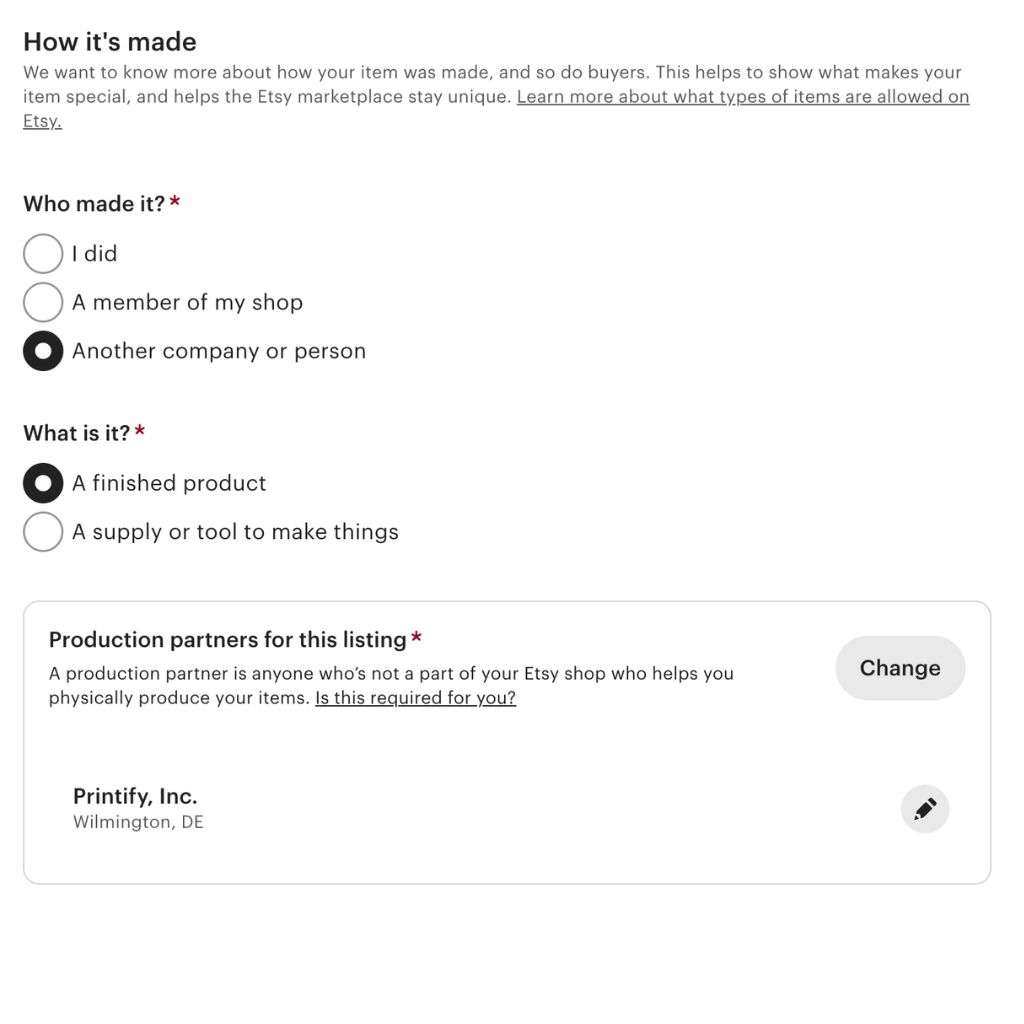
- Who made it: Choose "Another company or person" (your POD provider)
- What is it: Choose "A finished product"
- Production partner: Add Printify (or your provider) — required for POD
Organize the listing within your shop and choose how it renews.
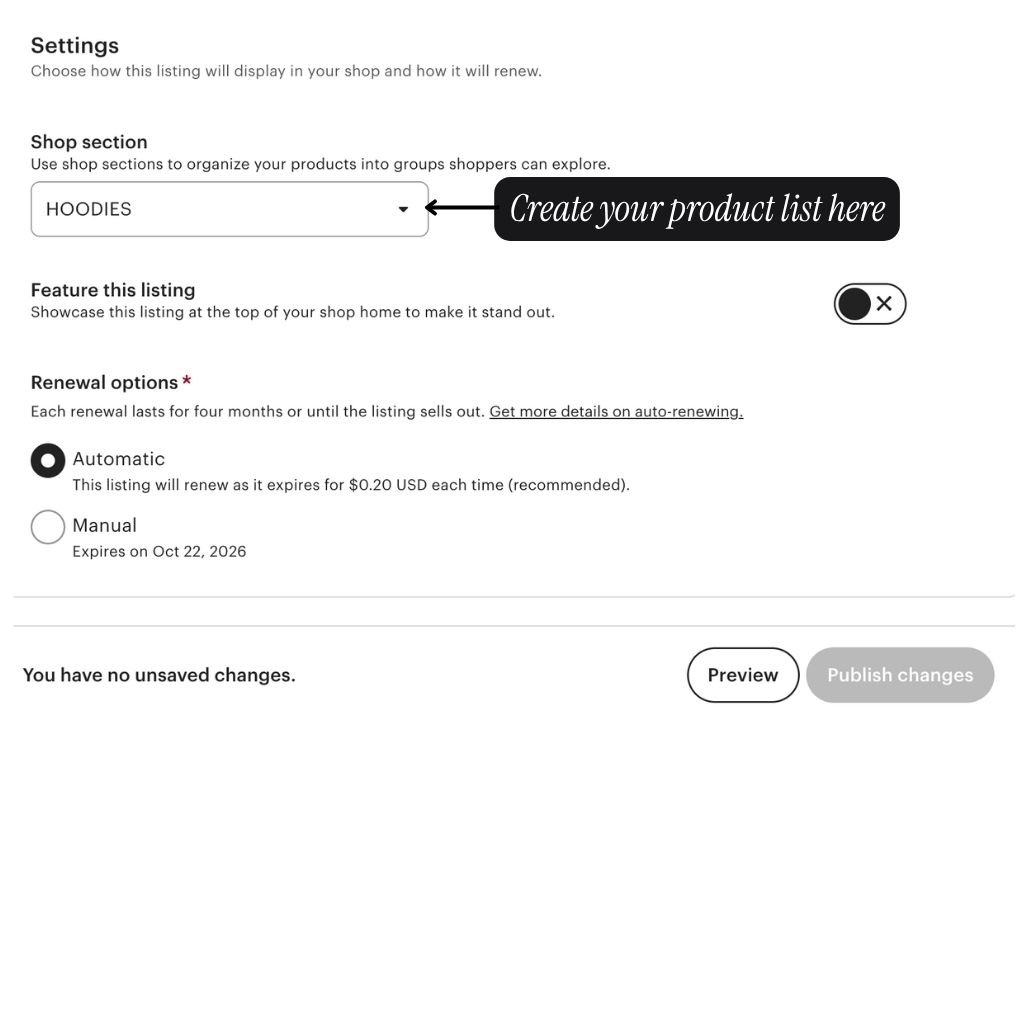
- Shop section: Assign to a section (e.g. "HOODIES") so shoppers can browse
- Feature this listing: Optional — showcase it at the top of your shop home
- Renewal: Automatic recommended — renews every 4 months for $0.20 (or until it sells out)
Review everything one final time, Preview how it looks to shoppers, then Publish to go live. The Preview / Publish bar sits at the bottom of the Settings screen (shown in Step 12).
- Preview: See how your listing will look to shoppers before it goes live
- Publish changes: Makes your listing live on Etsy
- After publishing: Give AI search engines time to index — check later by asking ChatGPT or Gemini about your product type